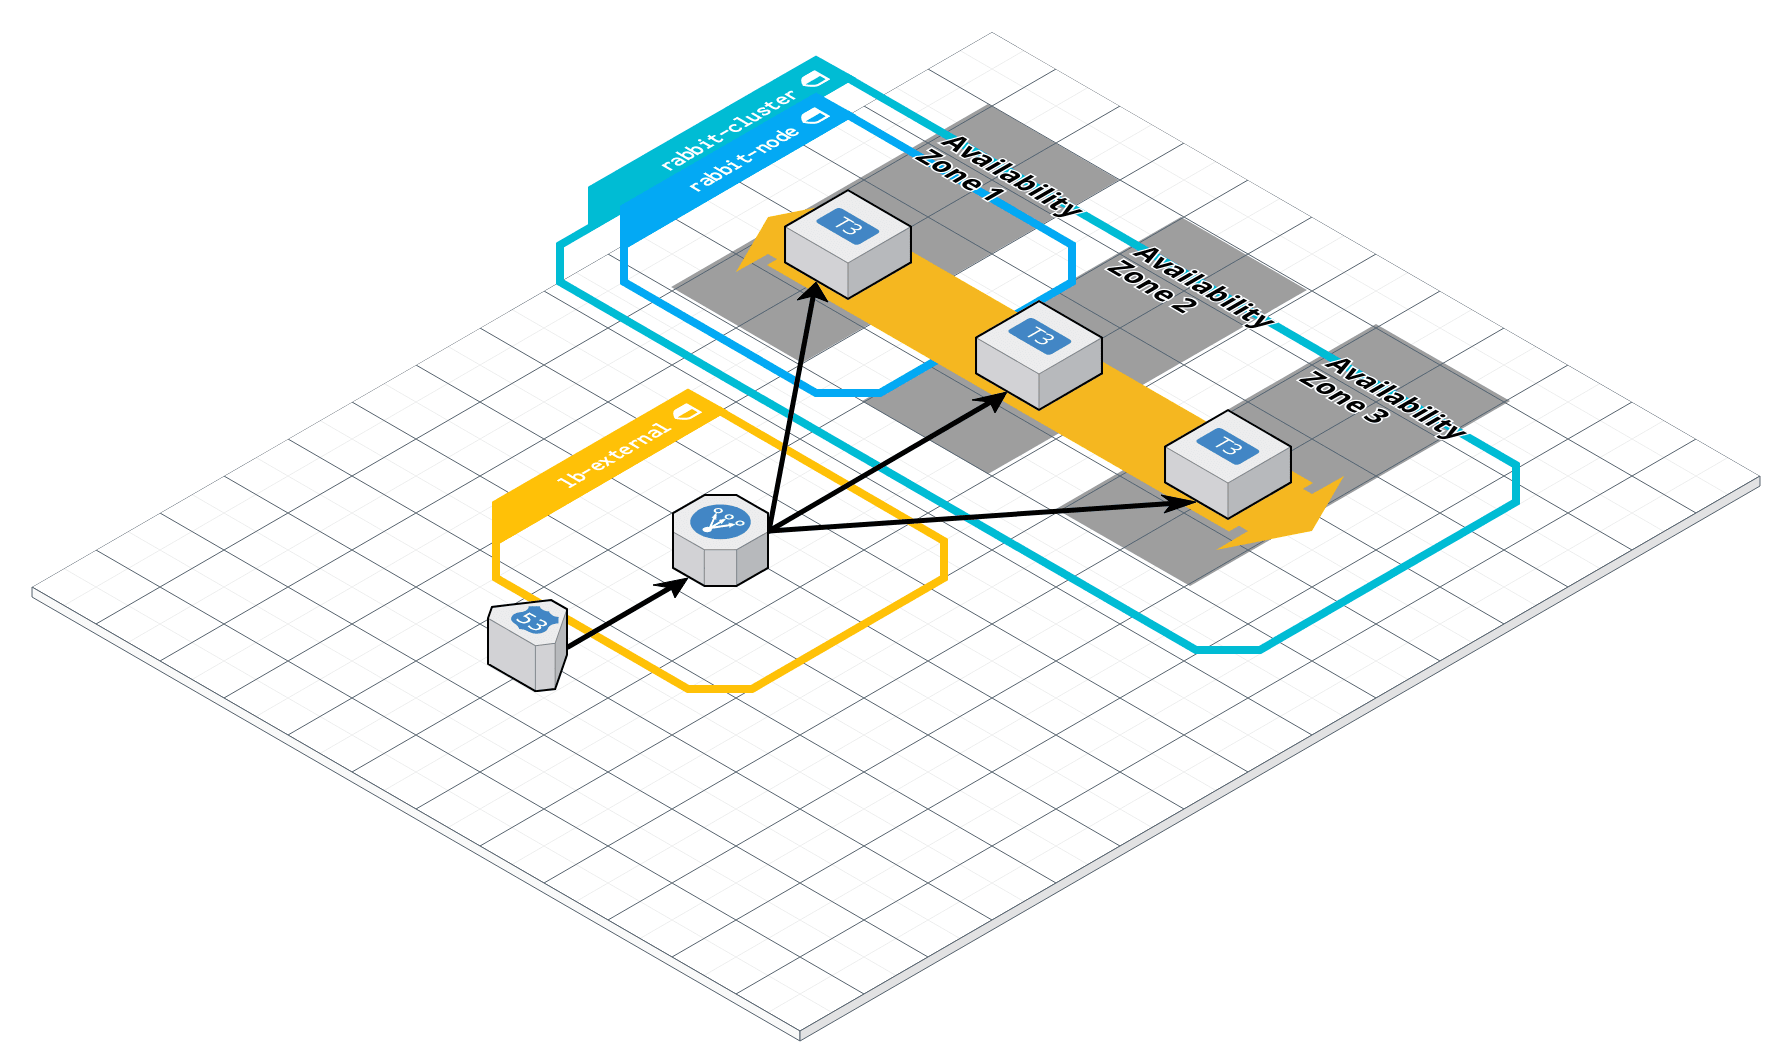
This repository is a set of two modules:
-
One to create an Auto Scaling Group that will bind rabbitmq nodes together using the rabbitmq plugins: rabbitmq_peer_discovery_aws
-
The other to declare two new entries on a private route53 zone, and bind them to a load balencer for the web interface management plugin and the default rabbitmq TCP port in order to open new connections and channels.
This module purpose is only to create a Rabbitmq Cluster and the routes to access it. It does not include the creation of a VPC nor the route53 zone used to access the Load balancer.
I'll let you refer to our other modules if you want to use them, otherwise it should be easy enough to plug this module in an already exisiting VPC (the alb beeing optional too).
Apart from the network, there is not much configuration to do as you can see in the example folder. Here are the main settings:
module "rabbit" {
  source = "path/to/module"

  name         = "An useful name to identify your clustser"
  environment  = "Specify the environment (Prod/Staging/Test/whatever...)"

  # To bind the manager together, Rabbitmq uses the Erlang cookie so it knows they can join the cluster
  erl_secret_cookie = "a random secret key"
  # As we use the rabbit_peer_discovery_aws we need credentials that can inspect ec2 or asg groups

  # https://www.rabbitmq.com/cluster-formation.html#peer-discovery-aws
  aws_access_key = "KEY"

  aws_secret_key = "SECRET"

  # See example for full usage of this var, here it's pass so we can name the cluster rabbimtq
  # https://github.com/CitizenPlane/terraform-aws-rabbitmq/blob/dc123d34742202811455d1bea50cb5f779186d2f/user_data/rabbitmq.sh#L122
  cluster_fqdn = "test"

  region                 = "eu-west-3"
  ssh_key_name           = "ft_ssh_key"
  desired_capacity       = 3
  autoscaling_min_size   = 3
  autoscaling_max_size   = 5
  instance_ebs_optimized = false

  vpc_id = "vpc_id"

  # Subnets Zone where the ASG will create your EC2 instances
  external_subnets = ""

  root_volume_size   = 20 # /
  rabbit_volume_size = 50 # /var/lib/rabbitmq

  associate_public_ip_address = true

  # Note : AMI are region related. Make sure the AMI you choose is available in your region
  # https://cloud-images.ubuntu.com/locator/ec2/
  image_id = ""

  # You define the CIDR block that can reach your private ip in your VPC
  # Don't forget to include your EC2 instances
  # Any Network Interface that may need to access this cluster ECR ELB ALB .....
  ingress_private_cidr_blocks = [
    "192.x.x.x/24",
    "10.x.x.x/22",
    "172.x.x.x/16",
  ]

  # A set of Public IPs that can access the cluster from oustide your VPC
  # For instance, these will be used to restrict the Rabbitmq management web interface access
  ingress_public_cidr_blocks = [
    "88.x.x.x/32",
    "195.x.x.x/32",
  ]

  # This is egress only settings for traffic going outside your VPC. You may not want your cluster
  # to be able to reach any ip from oustide your network
  internet_public_cidr_blocks = [
    "0.0.0.0/0",
  ]

  instance_type = ""

  az_count = 3

  cpu_high_limit    = "70"
  cpu_low_limit     = "20"
  memory_high_limit = "70"
  memory_low_limit  = "20"
}Starship Troopers narrator voice: Would you like to know more ? CitizenPlane is hiring take a look here

