An ansible role to install and configure OpenVPN server.
| Date | Version | Description | Changed By |
|---|---|---|---|
| 16 August 2018 | v.1.0.0 | Initial Draft | Yashvinder Hooda |
| 8 September 2018 | v.1.0.0 | Added Role for Debian | Sudipt Sharma |
| 9 October 2018 | v.1.0.0 | Updated Readme | Sudipt Sharma |
| 13 November 2018 | v.1.0.0 | Updated for RHEL | Sudipt Sharma |
| 28 February 2019 | v.1.0.0 | Added Gitlab-CI | Mahesh Kumar |
| 31 May 2019 | v.1.0.0 | Added molecule Test-cases | Ekansh Jain |
| 13 January 2020 | v.1.0.0 | Updated for AMAZON | Sudipt Sharma |
| 11 February 2020 | v.1.0.0 | Added tags for client create & revoke | Sudipt Sharma |
| 18th April 2020 | v.1.0.0 | Integrated circle-ci | Sudipt Sharma |
- This Role automates the VPN setup using OpenVPN. The role consist of two meta files
- clientlist: Enter the namer of the client you want to add.
- revokelist: Enter the names of the client you want to revoke.
-
Disable Source/Destination Check.
From the list of instances, select the VPN instance and then Networking->Change Source/Dest. Check from the drop down menu. Then click Yes, Disable. This is needed as otherwise, your VPN
server will not be able to connect to your other EC2 instances.
- CentOS:7
- CentOS:6
- Ubuntu:bionic
- Ubuntu:xenial
- Amazon AMI
- None :)
osm_openvpn
.
├── clientlist
├── defaults
│   └── main.yml
├── files
│   └── make_config.sh
├── handlers
│   └── main.yml
├── media
│   ├── add_connection.png
│   ├── addvpn.jpg
│   ├── client.png
│   ├── import_file.png
│   ├── save_key.png
│   ├── select_file.png
│   └── vpn.jpg
├── meta
│   └── main.yaml
├── molecule
│   └── default
│       ├── Dockerfile.j2
│       ├── INSTALL.rst
│       ├── molecule.yml
│       ├── playbook.yml
│       └── tests
│           ├── test_default.py
│           └── test_default.pyc
├── README.md
├── revokelist
├── tasks
│   ├── client_keys.yaml
│   ├── config.yaml
│   ├── easy-rsa.yaml
│   ├── firewall.yaml
│   ├── install.yaml
│   ├── main.yaml
│   ├── revoke.yaml
│   └── server_keys.yaml
└── templates
    ├── before.rules.j2
    ├── client.conf.j2
    └── server.conf.j2
10 directories, 31 files
| Variables | Default Values | Description | Type |
|---|---|---|---|
| server_name | server | OpenVPN server Name | Optional |
| PROTOCOL | udp | The protocaol on which the server will work | Mandatory |
| PORT | udp | The port on which the server will work | Mandatory |
| openvpn_server_network | 10.8.0.0 | CIDR range given to vpn network | Optional |
| base_directory | /etc/openvpn | Configuration path of openvpn server | Optional |
| easy_rsa_url | url | URL to download Easy RSA | Optional |
| block_all_connection | false | Block all communication for openvpn client | Optional |
| port_list | [80,443] | Allow specific ports for openvpn client & only applicable if block_all_connection == true | Optional |
---
- name: It will automate OpenVPN setup
  hosts: server
  become: true
  roles:
    - role: osm_openvpn
...

$  ansible-playbook site.yml -i inventory
- For generating client keys
$ ansible-playbook site.yml -i inventory --tags "generate_client_keys"
- For revoking client keys
$ ansible-playbook site.yml -i inventory --tags "revoke_client_keys"
An inventory should look like this:-
[server]
192.xxx.x.xxx    ansible_user=ubuntu
Client keys will be generated in /tmp/{{client_name}}.ovpn of local host.
Install OpenVpn
apt-get install openvpn -y
Install Openvpn GUI for ubuntu 18.04 bionic beaver
apt install network-manager-openvpn-gnome -yAfter installing go to network settings
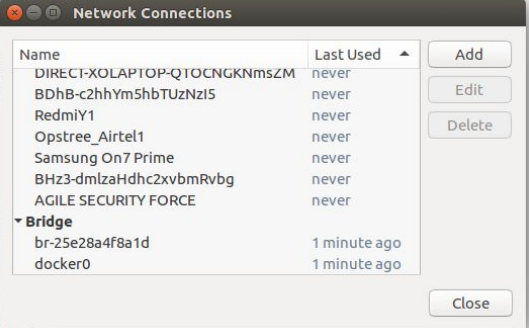
Add VPN to your network settings
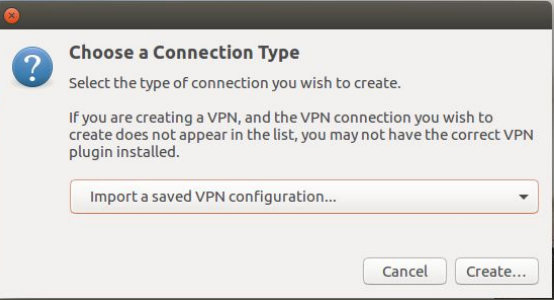
Then VPN settings and add browse your client.ovpn
Install Openvpn GUI for ubuntu 16.04 xenial
apt install network-manager-openvpn-gnome -yAfter installing go to network settings
Add .ovpn file to your network settings
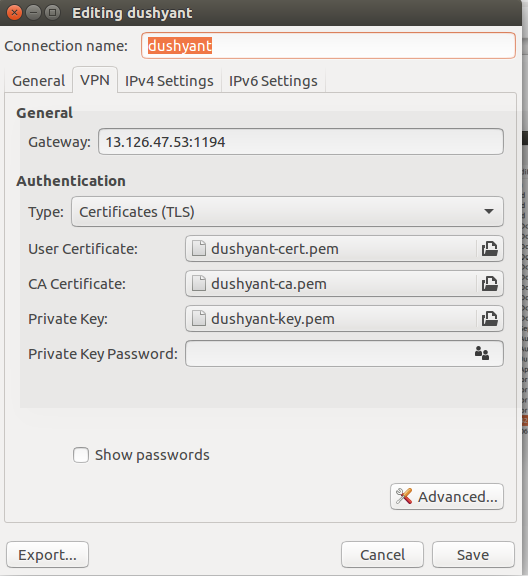
Then select the .client.ovpn file.
Then save the client.ovpn file.
- Fix the role to run on bare metal
- MIT / BSD


